How-to
How to finish seams without a serger
Published
Short answer
A regular sewing machine cannot make a true serged seam, but it can finish raw edges so they do not fray. Use a zigzag or three-step zigzag along the edge, or the overcast stitch with an overcast foot for the closest look to serging. For neat insides on light fabrics, use enclosed finishes like French seams, flat-felled seams or Hong Kong binding. A serger becomes worth buying when you sew lots of knits or garments.
Machines for this job
All 7 picks compared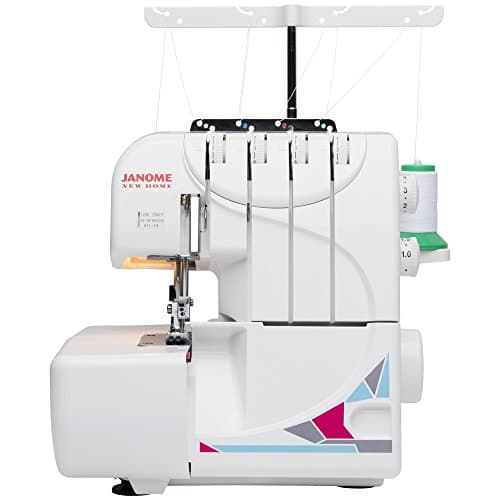
Janome MOD-8933: lay-in threading, quick rolled hem
See price on AmazonSee it on Amazon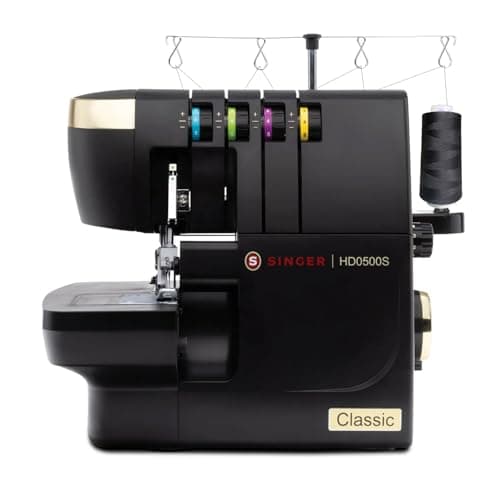
Singer HD0500S: 2-3-4 thread, lower looper LED
See price on AmazonSee it on Amazon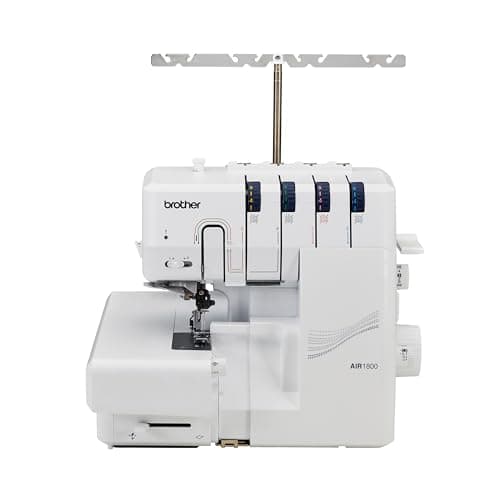
Brother AIR1800: jet air looper threading
See price on AmazonSee it on Amazon
This page is for sewists who see patterns that say to serge the seams and do not own a serger. It explains what a serger does that a sewing machine cannot, then walks through the edge finishes you can make with stitches and feet you probably already have, from basic zigzag to the overcast stitch, plus enclosed seams that need no special stitch at all. A table helps you pick the right finish for each fabric. It ends with how to tell when it is time to add a serger, and what one costs.
What a serger does that a sewing machine cannot
A serger, also called an overlocker, uses loopers instead of a bobbin. In a 4-thread overlock stitch, two needle threads form the seam and two looper threads wrap the edge. A knife trims the seam allowance just before the stitches form, so the machine sews, trims and finishes in one pass. Differential feed helps knits stay flat instead of stretching or rippling.
A regular machine forms a lockstitch with one top thread and one bobbin thread. It cannot wrap the edge with loopers or trim as it goes. What it can do is sew stitches that hold the fibers at the edge so they cannot unravel, which is the main job of a serged finish. For more on the difference, see serger vs sewing machine and what is a serger.
Zigzag and three-step zigzag edge finish
The plain zigzag is the simplest edge finish and works on nearly every machine. A three-step zigzag, sometimes called a multi-stitch or tricot zigzag, makes three small stitches on each side of the zigzag. It lies flatter and holds loosely woven fabrics better than a plain zigzag.
- 1
Sew the seam with a straight stitch as the pattern says.
- 2
Trim the seam allowance to an even width if needed.
- 3
Set a zigzag of medium width, around 4 to 5 mm, and a short to medium length, around 1.5 to 2.5 mm.
- 4
Sew so the right swing of the needle lands just off the raw edge, or just inside it on fabrics that tunnel.
- 5
Press the seam. Finish allowances together and press to one side, or finish each separately and press open.
Note.If the edge tunnels or curls under the zigzag, stitch slightly inside the edge and trim close to the stitches afterward, or switch to a three-step zigzag.
Overcast stitch and the overcast foot
Many computerized and some mechanical machines include one or more overcast stitches. They combine straight stitches and zigzags in a pattern that wraps the edge, and some are designed to sew the seam and finish it in one pass. They are the closest look to serging a regular machine can make.
An overcast foot, often labeled G or C depending on the brand, has a guide that rides along the raw edge and a small pin or bar that the stitch forms over. The pin keeps the edge flat so it does not tunnel. Check your manual for the stitch numbers that work with the foot, since the needle must not swing into the guide.
Some brands also sell side-cutter attachments that trim the edge as you sew, which gets closer still to a serger's result. They fit specific machines, so check compatibility before you buy one.
Enclosed seams that need no special stitch
Enclosed finishes hide the raw edge inside the seam itself. They take more time but give a clean, durable inside that many sewists prefer to any overcast finish, especially on light fabrics and unlined garments.
- French seam: sew wrong sides together with a narrow allowance, trim, press, then sew right sides together to enclose the edge. Best for sheer and lightweight wovens.
- Flat-felled seam: one allowance is trimmed and the other is folded over it and topstitched flat. Strong and common on jeans and shirts.
- Hong Kong binding: each allowance is wrapped in a bias strip. Good for unlined jackets and thick fabrics that fray.
- Turned and stitched: fold each raw edge under and stitch close to the fold. Simple for light to medium cottons.
- Pinking: cut the edge with pinking shears. Fast for stable fabrics that fray little, but it slows fraying rather than stopping it.
Which finish to use for which fabric
For knits, the seam itself must stretch. Sew with a narrow zigzag, a stretch stitch or a lightning bolt stitch and a Ballpoint or Stretch needle. Most knits do not fray, so the finish is mostly about looks. See the sewing machine needle size chart for the right needle.
Quilting cotton, shirting
- Good finishes without a serger
- Zigzag, overcast, turned and stitched, flat-felled
Sheer and lightweight wovens
- Good finishes without a serger
- French seam
Denim and twill
- Good finishes without a serger
- Flat-felled, three-step zigzag
Loosely woven linen, wool
- Good finishes without a serger
- Three-step zigzag, Hong Kong binding
Knits and jersey
- Good finishes without a serger
- Narrow zigzag or stretch overcast stitch; knits fray little
Unlined jackets and coats
- Good finishes without a serger
- Hong Kong binding
| Fabric | Good finishes without a serger |
|---|---|
| Quilting cotton, shirting | Zigzag, overcast, turned and stitched, flat-felled |
| Sheer and lightweight wovens | French seam |
| Denim and twill | Flat-felled, three-step zigzag |
| Loosely woven linen, wool | Three-step zigzag, Hong Kong binding |
| Knits and jersey | Narrow zigzag or stretch overcast stitch; knits fray little |
| Unlined jackets and coats | Hong Kong binding |
When a serger becomes worth it
A serger is worth considering when you sew many garments, especially knits like T-shirts, leggings and activewear, or when you want a ready-to-wear finish inside every seam. It saves a lot of time because it sews, trims and finishes in one pass at high speed.
A serger does not replace a sewing machine. It cannot sew buttonholes, topstitch or insert zippers in the usual way. Most sewists use both.
Serger listings on Amazon range from about $240 for basic 3 and 4 thread models to about $2,100 for air-threading models like the Juki MO-3000QVP. See the best sergers, the best sergers for beginners and how to use a serger for beginners. For hemming knits like a store-bought T-shirt, read serger vs coverstitch.
Frequently asked questions
Can I serge with a regular sewing machine? Not truly, since a regular machine has no loopers or knife. It can finish edges with zigzag or overcast stitches, which prevents fraying in a similar way.
What foot do I use to serge on a sewing machine? Use the overcast foot that came with your machine, often labeled G or C. Pair it only with the stitches the manual lists for that foot.
Can you use a serger for regular sewing? A serger can sew seams on knits and finish edges, but it cannot sew buttonholes, topstitch or do most construction tasks. You still need a sewing machine.
Is a zigzag finish strong enough for clothes? Yes for most home-sewn garments. For seams that see heavy wear, like jeans, a flat-felled seam is stronger.